Posted by Keith Elder | Posted in Erlang, XBOX 360 | Posted on 20-02-2014
0
Erlang – Hot Code Loading on Nodes For Dummies
Hot code loading across nodes in Erlang is a fantastic feature. After hearing about this feature it peaked my interest early on about Erlang and got me to dig in more. But, I couldn’t get it to work because of my newbyness to Erlang! Hopefully this blog post will help others.
Imagine You Are a .NET Windows Service
To understand how hot code loading in Erlang works let’s picture for a moment a Console application or Windows Service or Web Service deployed to three different machines. As an Engineer we need to do a simple fix and redeploy code. What do we have to do? Well we have to make our change locally then build the solution, run unit tests, etc. Now it is time to deploy our simple change. This is where things start diverging fast between Erlang and other technologies. In .NET/Java we have to copy the entire library to each server and then cycle through stopping and starting each process on each server so the new code will get picked up. Whether this is Java or .NET doesn’t matter the same thing applies. Even if your language of choice is a dynamic language like PHP/Ruby/Python you still have to copy the file you changed to all servers. The server or process doesn’t have to be restarted in dynamic languages but you still have to copy the file(s) to the various servers either way. In Erlang we can simply connect to a node and then network load the new code across all nodes in the cluster!
See this is the big difference. Erlang is distributed out of the box. It was built to be distributable and continue running, even during code pushes. Erlang was designed with the purpose in mind that a system had to keep running. Think about it for a second. What if the phone company said you couldn’t make a call between 9:00 PM and 1:00 PM on a Saturday night because of maintenance window? Yeah that wouldn’t go over very well. There are numerous reports of uptime in systems written in Erlang. Many fans of Erlang use the terms of 9 9’s (and there is even a company called Nine Nines) which his 99.9999999% uptime. If you do the math that is about 30 milliseconds of downtime a year. What? Yeah. That.
Here’s a quick walk through on how to do this. I tried several times to get it to work and kept running into errors and getting errors so I’ll cover them so you won’t have to struggle at first as much as I did. Here we go.
Install Erlang
I assume you wear big boy pants and know how to install software but here are a few quick ways to get Erlang installed and up and running.
Open a terminal / cmd prompt window after it is installed and type “erl”.
If you’ve gotten this far, good, you have Erlang installed. By the way to exit type “ctrl-g” and then “q” (for quit).
Now let’s write a simple program that will add two numbers.
Our Program – demo.erl
-module(demo).

-export([add/2]).

add(A, B) ->
   A + B.
Copy the above code into a file named demo.erl. Note: it has to be named demo.erl because the first line declares the module name as demo. This is based on a convention as the name of the module and file have to match.
While Erlang is a dynamic language it is still compiled. To compile this from the cmd line type: “erlc demo.erl”. If there are no errors the command prompt should just return. If there are errors they will print to the screen. If you are typing by hand be sure each line ends with a dot (period).
The above file isn’t magical, it simply adds to numbers. For those coming from a .NET/OOP background think of the export line as making the function add public. Since Erlang is a functional language there are no classes! This is a good thing as Erlang programs are a lot smaller than languages such as C++/.NET/Java.
Setting Up Our Nodes
Because Erlang is distributed we can create multiple nodes and run our module demo across three nodes. Typically you’ll do this on completely different servers but because Erlang runs within a VM we can start three instances of the VM locally, connect them, and we have a distributed program. To do this open three terminal windows or command prompts. I’m using a Mac so I will be using tmux in iTerm2 for these examples.
NOTE: BE SURE WHEN YOU RUN THE FOLLOWING COMMANDS YOUR demo.erl FILE IS IN THE DIRECTORY FOR THE FIRST NODE YOU START!
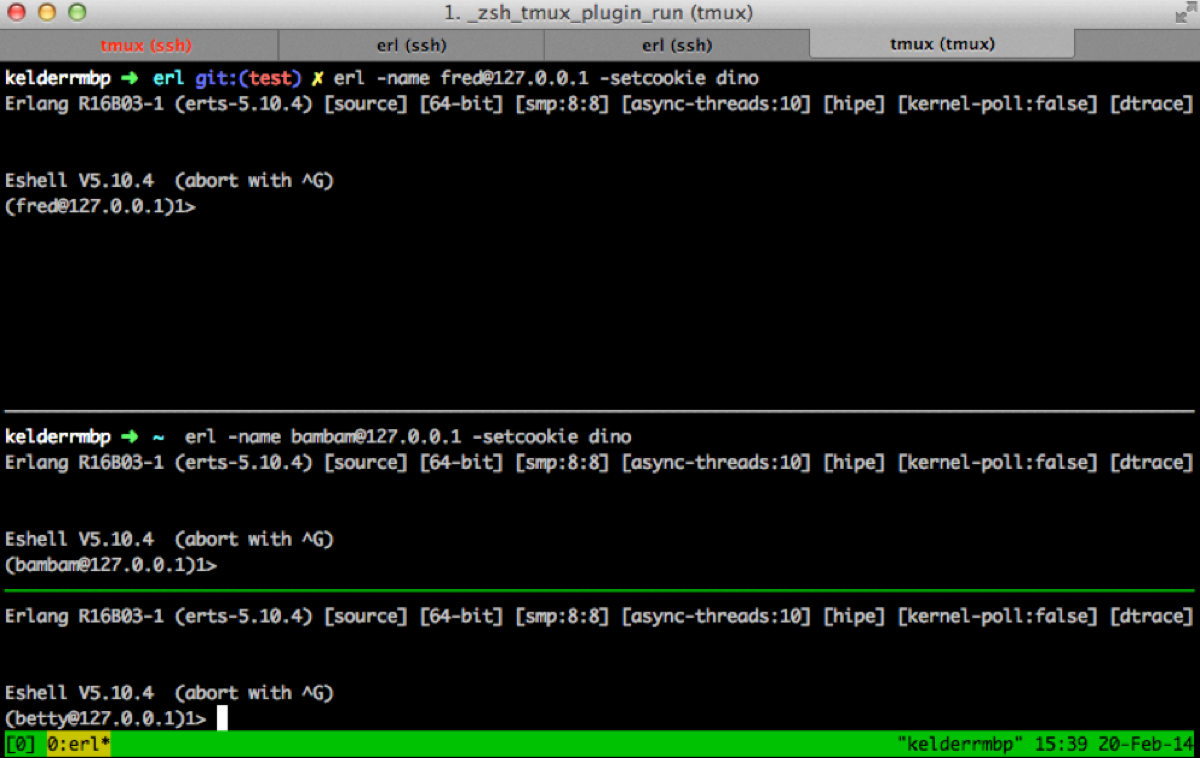
If you want to follow along with my screen shots be sure to install tmux (brew install tmux). I’ve created three cmd prompts inside of tmux and each one I’m going to run the following command to start an Erlang instance in each one:
As you type each one in your command prompt change the name of the flint stone character. I’m using the following: fred (node1), bambam (node2), betty (node3). After doing so you should have three Erlang prompts that look like this if you are using tmux.
So what did we just do? Well the -name gives each instance their name of course. The -setcookie option is super important as this is what really connects all three Erlang VM’s together. That cookie has to be named the same.
Running Our Code
Now that we have al three started let’s load our demo program into the top one and run it.
To do that we are going to type the following:
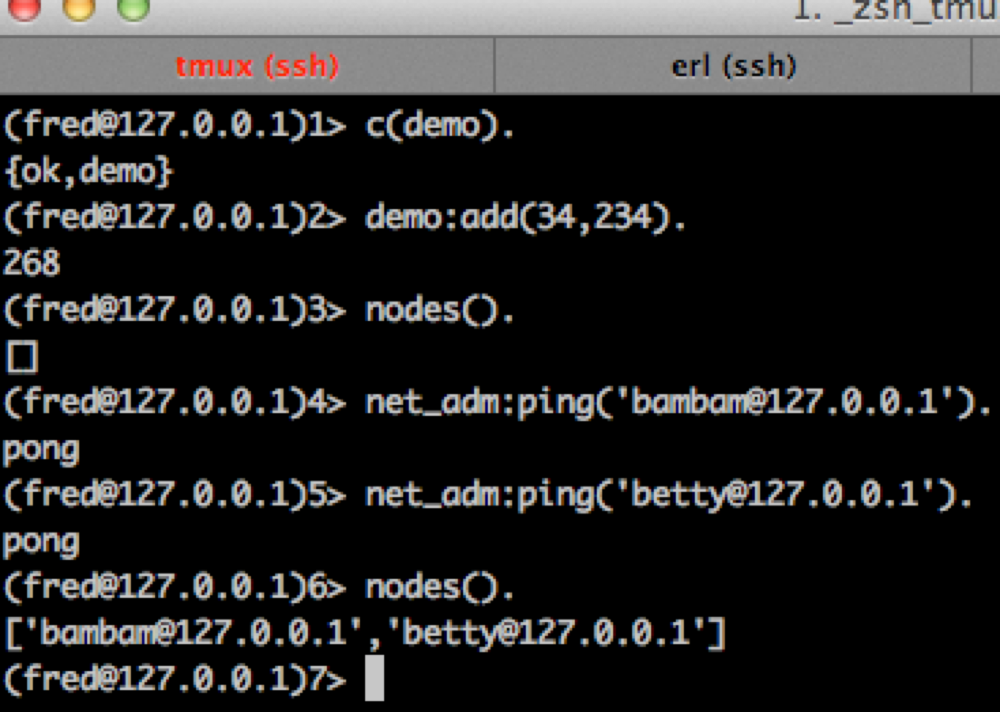
c(demo).
The result of running that command should be: {ok,demo}. That means our code was compiled. Again be sure the demo.erl is in the folder of the first Erlang shell when you launch it. To run it simply type:
demo:add(34,34343).
Press enter and you’ll get back those numbers added together.
So far our other two instances know nothing about our demo module. But let’s clue them in so they can run it too! To do this we are going to ping the nodes so all three are communicating. In your first Erlang shell type: nodes(). This should return [] which means there are no other known nodes. Let’s add them though.
To do this we are going to type the following into the first instance (fred):
Now type nodes(). and you should get back a list containing both bambam and betty.
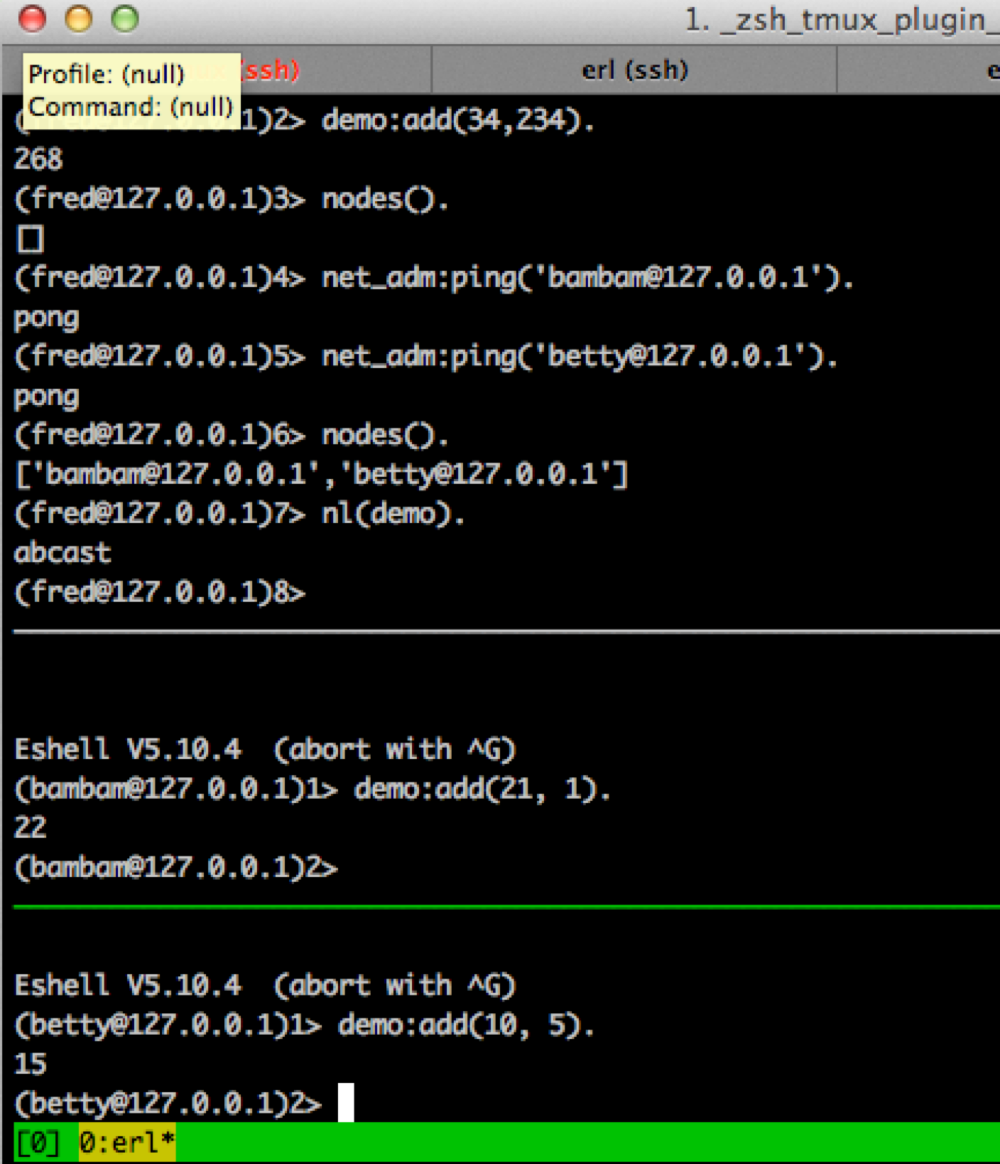
At this point all three are connected. We can now hot load some code for them all to run. Let’s push our demo.erl program to all of the nodes (this works if you have 3 or 30). To do this we are going to use the function nl() which means network load. Run this command in your node1 instance (mine is fred).
Notice we get back “abcast”. Now we can go to the other nodes and run demo:add(4,5). and it works! We just hot loaded code to all the nodes in our cluster.
If you aren’t sitting back in your chair right now scratching your head going *holy cow* you should be. This is amazing. Take it from me. To do this in other technologies would be mountains and mountains of work. Trust me, I’ve done it.
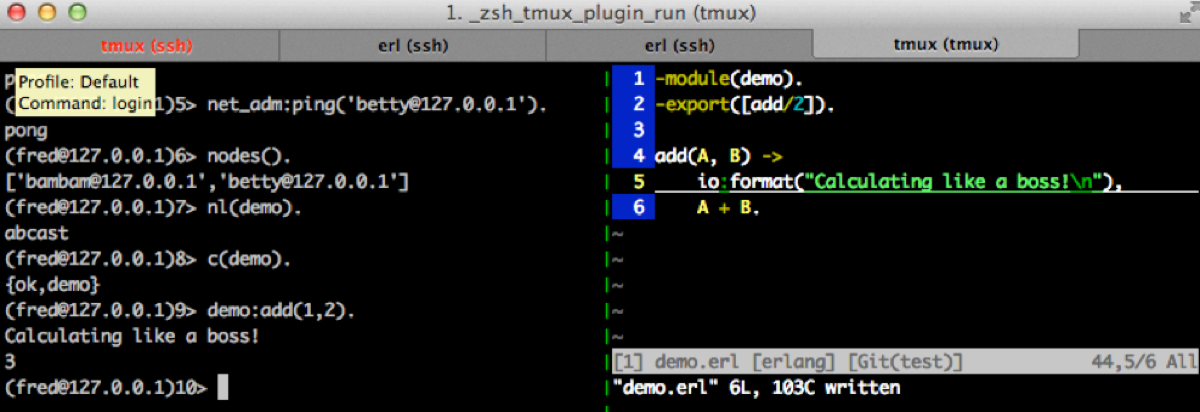
In the case above we basically deployed new code to new instances. What if we want to change it will it is running? Basically the same thing is just as simple. Edit the demo.erl file and add the following line above the A + B. line.
io:format(“Calculating like a boss!\n”).
This is the equivalent of doing “Console.WriteLine()” for those .NET folks. We can test this out on our first node by running c(demo). again. Run demo:add(1,2). in the shell and you should get something like this:
Great it worked. Now let’s push our change to all our nodes! Simple. Just re-run nl(demo). and then re-run a calculation on each node. Boom! Hot code loading.
Hopefully this little walkthrough will give you some encouragement to look into Erlang. I left out a lot of details about how things worked intentionally as if I didn’t the article would be just too long. Thank for reading and more Erlang articles to come.