

Sync Services for SQL Server Compact Edition 3.5 in Visual Studio 2008
Posted by Keith Elder | Posted in Smart Clients, SQL Server Compact Edition | Posted on 23-09-2007
32
One of the new features in Visual Studio 2008 provides the ability to easily sync data from the server to the client and the client to the server using Sync Services for ADO.Net. For developers supporting Winform and Smart Clients this is a much welcomed feature. Developers will be able to take advantage of Sync Services in a variety of ways including a local store for off line data as well as caching data locally for speed.
When you deal with syncing of data as a developer the first thing that pops into mind is conflict resolution. For those getting started with Sync Services we’ll look at how to setup sync services in a new project and then at some of the things you’ll need to know in order to handle conflict resolution within your applications. All of the source code for this is available for download at the end of the article.
One Way Data Sync with Sync Services
In Visual Studio 2008 we have several new templates to get us started. The one used for Sync Services is called “Local Database Cache”. To get started with Sync Services open Visual Studio 2008 and create a new windows application. Once you have your windows application created add a new item to your project and select the following template in the data category.
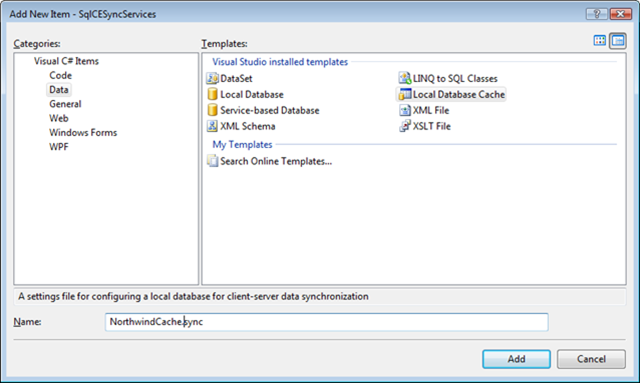
Essentially this file provides all the sync logic and we’ll use it later on to extend and insert our own logic for handling conflict resolution. Other options can be extended here as well but more on that later. Once the local database cache template is added to the solution a new screen to configure our data synchronization will be displayed.

From this screen we are going to select our database connection (or create one). In this walk through we are going to leverage the Northwind database. You can download this database from Microsoft if you do not already have it. Once the Northwind database is setup create a connection to it.
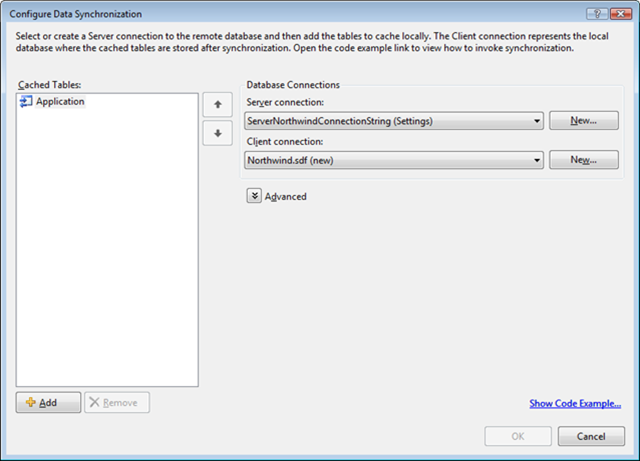
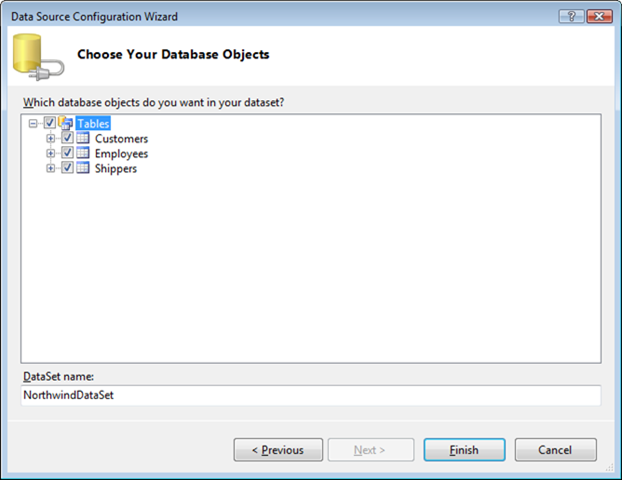
The next step is to identify the tables we want to sync from the server to the client. In the lower left corner of the configure data synchronization screen we are going to select the “add” button and choose our tables.
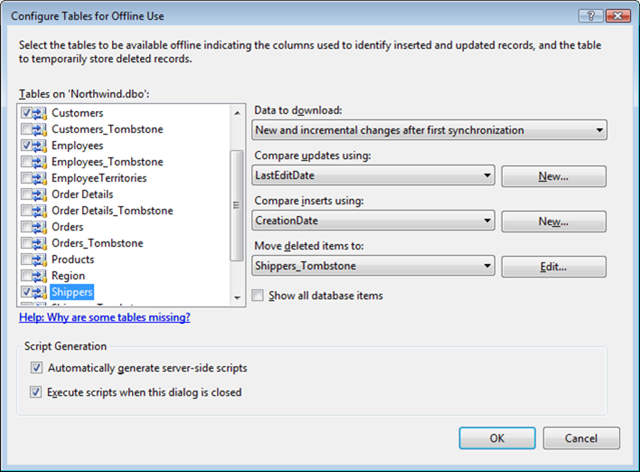
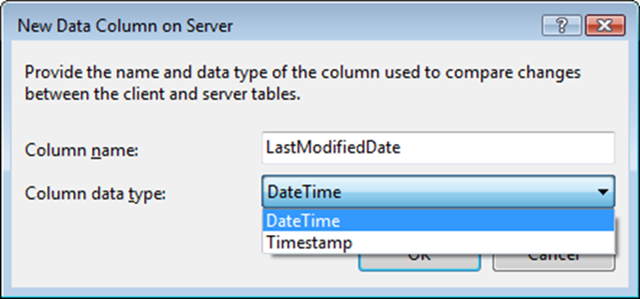
In the above example three tables were selected from the Northwind database: Customers, Employees, and Shippers. Note: If your tables do not use the built-in naming convention of “LastEditDate” or “CreationDate” to compare the update or insert statements click the “New” button and specify the name. For example, as a standard we typically use LastModifiedDate. In this screen note that DateTime and TimeStamp are both supported.
Once the tables are configured the only options left are under the advanced button on the main screen. This is where the project location is specified (which is how you move sync services to support WCF services) along with a few other options that should be self explanatory.

Once everything is configured press OK and the server database tables selected will be mirrored onto the client database you selected.
Once the data is synced into the local SQL server compact database the next screen shown allows us to build the data objects for the project. Strong-typed datasets are the default option since most if not all of the other controls such as DataGridView, BindingSource, BindingNavigator and others work natively with this type. It doesn’t mean another option like LINQ to Entities or something else couldn’t be used though. In this walk through we’ll stick with the dataset.
If you are following along the project will now look like this:
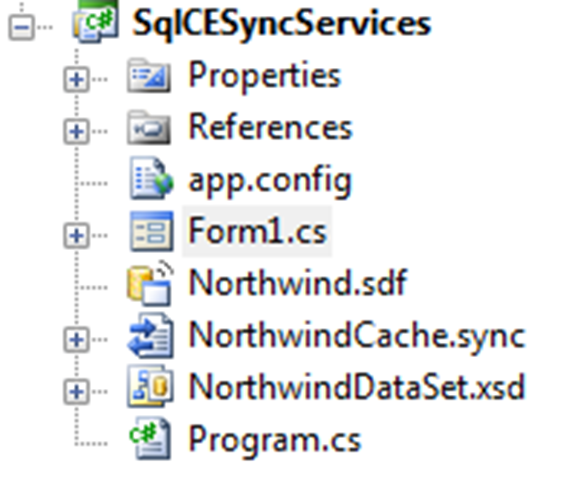
We started this whole process by using the “Local Database Cache” template. We now have a local SQL server compact edition database in our project called Northwind.sdf that will hold the local cache of our data. We also have the NorthwindCache.sync file that will provide the syncing ability and lastly we have a strong-typed dataset which has our customers, employees and shippers tables.
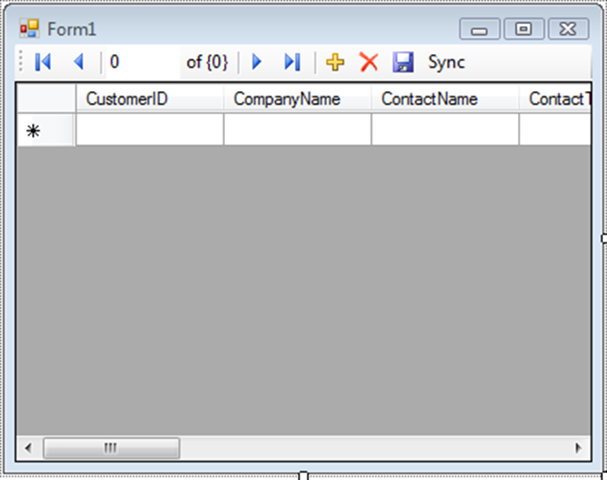
So we can see the sync in action drag the Customers table from the Data Sources window onto the default form provided and add a button that will trigger the sync in the BindingNavigator. The end result should look something like this:
To get the code we need for the click event of the form double click the NorthwindCache.sync file and press the link in the bottom right corner of the form called “Show Code Example..”. This form will display:

Press the “Copy Code to the Clipboard” and close this form and the configure data synchronization form. Paste the code into the click event of the sync button in the form. The code is fairly simple since it creates an instance of our sync agent and then calls sync. You’ll notice there is a TODO comment in the code that is pasted. We need to add a line of code that will merge in the changes into our instance of the NorthwindDataSet. Add this line to the sync click event.
this.northwindDataSet.Customers.Merge(this.customersTableAdapter.GetData());
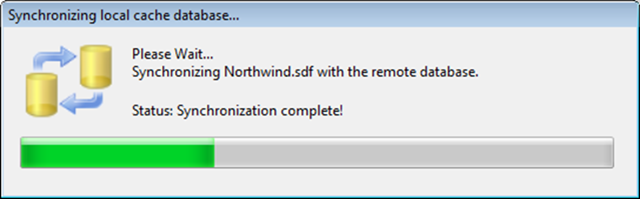
If you are following along we can now run our application. When it launches if we press the “Sync” button at the top of your form it will provide us a quick look at the options provided by the SyncStatistics object. Pulling the syncStats object into a quick watch window should look like this:
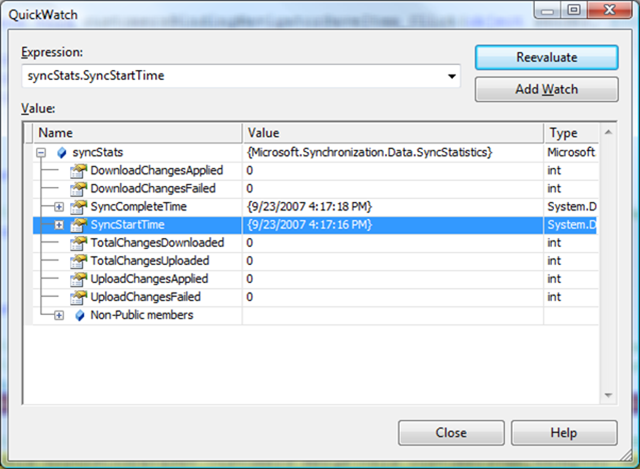
Remember there is nothing to sync at this point since a sync was already performed after we added the NorthwindCache.sync file to our project. It is also important to note that at this point we only have one way sync capability. In other words, if we change the data locally in the database it will never make it back to the server. If you are looking at a way to get data locally and cache it with a client / server model this is as far as you need to go with sync services. At this point local data will get synced with the latest changes from the server. We can easily add a timer to our application and have it sync every hour or based on network connectivity.
Bi-directional Sync With Sync Services
Although bi-directional syncing isn’t an option we can turn on yet in the sync designer we can enable it with one line of code. In your project right click the NorthwindCache.sync file and click view code. This will create a new file that will be a partial class that we can use to extend the sync agent with our own logic. In the OnInitialized method we are going to add the following line to enable bi-directional syncing on the customers table.
namespace SqlCESyncServices {

    public partial class NorthwindCacheSyncAgent {

        partial void OnInitialized(){
            this.Customers.SyncDirection = Microsoft.Synchronization.Data.SyncDirection.Bidirectional;
        }
    }
}
With this one line, any changes we make to the local data will now be sent back up to the server and any changes from the server will be sent back down to the client. It is at this point when changes are allowed to be made locally and on the server we have to handle conflicts.
Handling Conflicts with Sync Services
To handle our conflicts we are going to continue to flesh out the above file. Remember this code isn’t affected by the designer so we can customize this to suit the business logic needs of our application. The first thing we are going to do is add a new partial class to our code behind file for our sync agent. For clarification we are going to be adding this code into this file.

If this file is missing simply right click NorthwindCache.sync and click “View Code”. This file will be generated.
We are going to take advantage of two features of C#. One is partial classes to handle our conflicts, the other is a newer feature called partial methods. The reason the partial method is needed is our NorthwindCache.Designer.cs file already has a parameterless constructor in the object we need to extend. In order for us to work around this the OnInitialized() method is marked as partial in the class which allows us to wire up our own events.
In the NorthwindCache.cs code behind file, add a new partial class called NorthwindCacheServerSyncProvider. In this class we are going to implement the OnInitialized() partial method so we can wire up our events to handle conflicts (and various other things). The main event we care about for conflict resolution is the ApplyChangeFailed event. Our class stub will look something like this starting out.
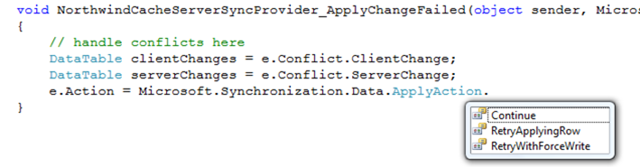
    public partial class NorthwindCacheServerSyncProvider
    {
        partial void OnInitialized()
        {
            this.ApplyChangeFailed += new System.EventHandler<Microsoft.Synchronization.Data.ApplyChangeFailedEventArgs>(NorthwindCacheServerSyncProvider_ApplyChangeFailed);
        }

        void NorthwindCacheServerSyncProvider_ApplyChangeFailed(object sender, Microsoft.Synchronization.Data.ApplyChangeFailedEventArgs e)
        {
            // handle conflicts here
        }
    }
In the ApplychangeFailed event we have a lot of options. We have the client changes along with the server changes available to us to do some really fancy merging of data along with different actions we can take based on the the conflict. We can chose to continue, retry, or retry and force write actions as seen in the below screen shot.
One example as to how this might be handled is to create a screen that displays both sets of data so the end user can make the choice which one they prefer and or merge the data from both records. Obviously this will require a lot of thought and time to create but here is a sample that shows the Region on the client and the server are different and caused a conflict.

Here is the code that was added into the ApplyChangeFailed event.
   public partial class NorthwindCacheServerSyncProvider
    {
        partial void OnInitialized()
        {
            this.ApplyChangeFailed += new System.EventHandler<Microsoft.Synchronization.Data.ApplyChangeFailedEventArgs>(NorthwindCacheServerSyncProvider_ApplyChangeFailed);
        }

        void NorthwindCacheServerSyncProvider_ApplyChangeFailed(object sender, Microsoft.Synchronization.Data.ApplyChangeFailedEventArgs e)
        {
            // handle conflicts here
            DataTable clientChanges = e.Conflict.ClientChange;
            DataTable serverChanges = e.Conflict.ServerChange;

            CustomerConflictResolution frmConflict = new CustomerConflictResolution();
            frmConflict.clientBindingSource.DataSource = clientChanges;
            frmConflict.serverBindingSource.DataSource = serverChanges;
            frmConflict.ShowDialog();

        }
    }
One would need to keep going in this direction and resolve conflicts based on the data being resolved and the business logic surrounding that data. It may be the last record edited wins or it may be that you need to merge data from one to another.
As we can see in this walk through, Sync Services with SQL Server Compact Edition 3.5 adds a lot of new and much needed functionality to Visual Studio 2008. I suspect that due to the ease at which data can be cached locally and synced a lot of developers will embrace this ability first. If you are writing Smart Clients do investigate the ability of Sync Services to run under WCF. It is supported and can be accomplished by moving the sync agent to another project (which is why I mentioned WCF in the advance screen above). Happy syncing!