Welcome

You have reached the blog of Keith Elder. Thank you for visiting! Feel free to click the twitter icon to the right and follow me on twitter.

Deep Fried Bytes Episode #17: Discussions about Gnome, Linux and Software Development with Luis Villa – Part 2

Posted by Keith Elder | Posted in Linux, Open Source, Podcast | Posted on 07-11-2008

 Listen To This Episode 

http://deepfriedbytes.com/podcast/episode-17-discussions-about-gnome-linux-and-software-development-with-luis-villa-part-2/


This is part two of a conversation we had with Luis Villa.  In the second part of this conversation we talk to Luis about all sorts of things including open source licenses, Google, Apple, Microsoft, Office and more.  We even have a war stories segment in this episode.  This is a continuation of part one, but honestly, we think it is the best part.  Enjoy.

Ways To Listen To The Show

There are several ways to listen to Deep Fried Bytes.

1. Directly From The Web Site (or click the link above)

When you visit the site look for this:

Clicking the triangle will launch the Yahoo! media player and automatically start playing the show for you. As long as you leave the browser window open the player will stay open. Clicking off the page WILL stop the player!

2. Subscribe via iTunes and Zune

If you have iTunes or Zune installed on your computer you can subscribe to our show. In iTunes open the Music Store and search for “Deep Fried Bytes”. In the Zune software, go to the MarketPlace select Podcast and search for “Deep Fried Bytes” to subscribe to the show. You can also click either of the two icons below to automatically subscribe to the show if you have iTunes or Zune installed.

Subscribe via iTunes Store Subcribe via Zune Market Place

3. Subscribe to RSS Feed

To stay current and up to date with the show, subscribe to the site’s RSS Feed. If you don’t know about RSS feeds you can read more here: http://en.wikipedia.org/wiki/RSS_(file_format)

If you already have an RSS reader installed and setup, click the feed icon below to grab our news feed.

Subscribe to our podcast!

Voting in Mississippi 2008

Posted by Keith Elder | Posted in General | Posted on 04-11-2008

After I got up this morning and checked email I headed over to the voting station for my area.  The place where we vote is a community center in oddly enough a community called “Dixie”.  I’ll let you insert your own jokes for that one.

I got there a little after 7:30 AM.  The people there voting were working people: nurses, professors, construction workers, police, Wal-mart cashiers, and of course a lonely software engineer.  Here’s the line when I first arrived.

IMG_1055

After about 15 minutes or so of waiting I finally got inside.

IMG_1057

I gave my name, and I was given a voter card.  Fancy!  And who says we don’t have technology in this fine state?

IMG_1064

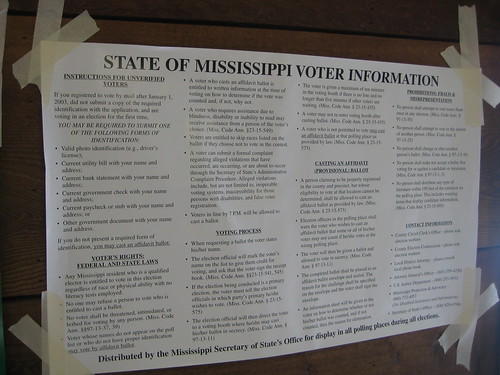
As I was standing in line there were signs taped to the wall which outlined all the rules of voting.  If you blow this up by clicking on the picture you can probably read the text.

 IMG_1058

Fortunately there wasn’t a single person person campaigning outside of the building.  It was rather peaceful, the way it should be.  I voted one time in Ann Arbor, MI and it was the absolute worst experience of my life.  I felt as if I was being hunted and stalked when I walked up to the building.  It wouldn’t have been so bad but everything each person was trying to get me to vote for I was 100% against. 

 IMG_1060

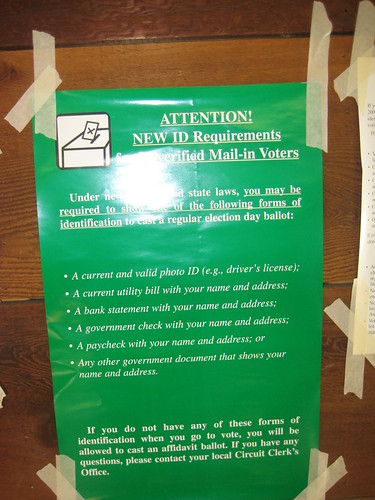
I was a little confused by this sign because I was never asked for ID.  I did have my voter registration card in hand and I couldn’t tell if the lady actually read my name from it or not.

 IMG_1059

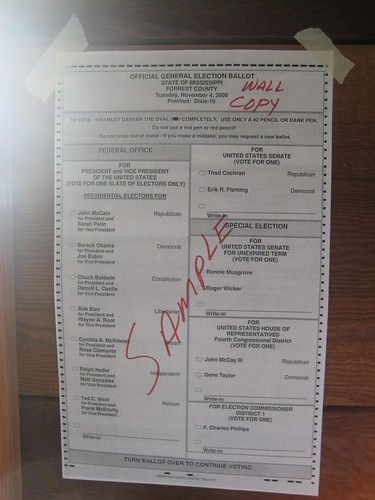
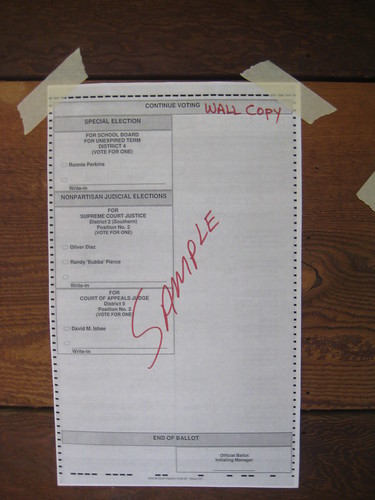
As you’ll see, we used electronic voting machines.  This is the paper version of what the ballot is suppose to look like.

IMG_1062

 IMG_1061

They had voting machines lined up against the walls.  The gentleman helping a voter is my next door neighbor, a retired Boy Scout leader.

 IMG_1065

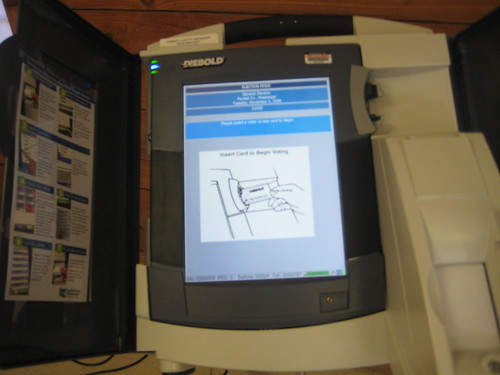
Finally it is my turn.  Here is the voting machine.  It is made by Diebold.  The way it worked is you slid the voter card into the slot up top.  Then the screen came on giving you instruction.  The device is a touch screen device running some version of windows. 

 IMG_1066

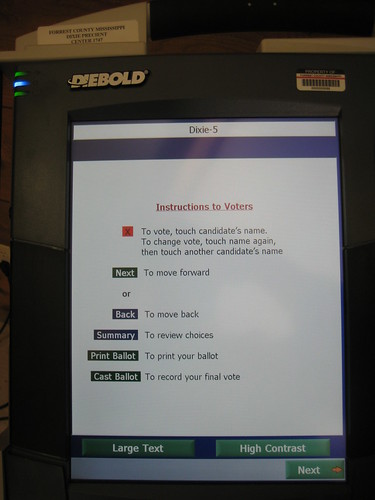
Here is the instructions screen.  Very simple.

 IMG_1067

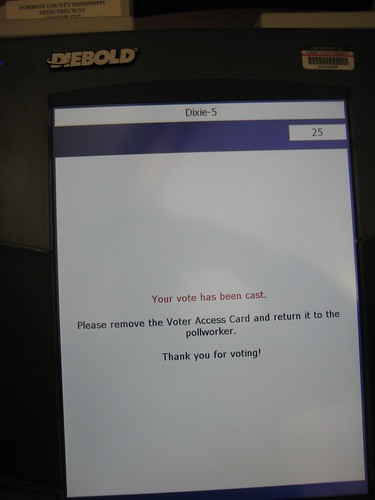
After I voted the machine made some clicking sounds and my vote was on the way to Jackson, MS. 

 IMG_1068

I then handed my voter card to my neighbor.  He took the card and gave it to the ladies at the table which then reset the card so it could be reinserted into the machine by someone else.  All and all an easy process.

The question on everyone’s mind I know is “Who did you vote for?”.  I’ll leave you with these Words of Wisdom:

I voted for the right one.

Presenting at Greater New Orleans .Net User Group Nov. 11th

Posted by Keith Elder | Posted in Speaking | Posted on 03-11-2008

image After living only 1.5 hours away from New Orleans for about 3 years, I am finally making a trip down to speak at the .Net User Group in Metairie, LA.  If you look at the map I’ve graciously included for you, you’ll notice that I am really not that far at all. 

I’ve been to Mobile to speak several times so this will be a nice trip to go the other way and meet some new people.

I would say what I will be speaking on but I don’t know yet, it is still being decided.  I’ll update this post when I get the official word.  If you are in the area I hope you’ll stop in.  I will have some Deep Fried Bytes stickers with me so right there is enough reason to come. 🙂

Creating a REST WCF Service From an Existing XSD Schema

Posted by Keith Elder | Posted in .Net, Asp.Net, WCF, Web Services | Posted on 02-11-2008

A reader of this blog sent me an email asking the following question:

“I have an XSD that I am required to use to export my company’s data. How can I use that XSD and return data to them in a web method? I should be able to return a data set with the information formatted the way the XSD defines but I have no idea how to do that. Any ideas would save me a ton of time and grief!”

Turns out this is a really good question, and I think one a lot of developers struggle with primarily because the majority of developers are scared of XSD schemas.  Hopefully I can change that.  An XML Schema is really simple and it is your friend. 

What is an XSD or Xml Schema Definition?

An XML Schema describes the structure of an XML document.

That’s it, see, it isn’t that hard after all!

As a developer think of an XSD the same way you would when creating business rules to validate objects before storing them into a database.  Some items in objects cannot be null, some can.  Some need to have their data formatted (email address for example) and others need to not exceed certain lengths, etc. 

When dealing with an XML document, we need to apply the same type of rules and this is where the XSD comes in.  Once we have an XSD to describe an XML document we can guarantee any XML data we receive conforms to these rules.

Ok, enough intro, let’s get coding.

The Schema

In the case of the reader’s question, an XSD schema already existed.  To save time, I’ve taken then general idea of the schema I was sent and slimmed it down for simplicity sakes.  The schema represents an XML document that will contain job listings. Here is a view of the schema from the schema explorer in Visual Studio as well as the schema itself (again slimmed down).

   1: <xsd:schema
   2:   xmlns:xsd="http://www.w3.org/2001/XMLSchema"
   3:   targetNamespace="http://keithelder.net/Jobs"
   4:   xmlns:xs="http://keithelder.net/Jobs">
   5:  
   6:   <xsd:complexType name="JobListing">
   7:     <xsd:sequence>
   8:       <xsd:element maxOccurs="unbounded" minOccurs="1" name="job" type="xs:Job" />
   9:     </xsd:sequence>
  10:   </xsd:complexType>
  11:  
  12:   <xsd:complexType name="Job">
  13:     <xsd:sequence>
  14:       <xsd:element maxOccurs="1" minOccurs="1" name="Title"  type="xsd:string"></xsd:element>
  15:       <xsd:element maxOccurs="1" minOccurs="1" name="Description" type="xsd:string"></xsd:element>
  16:       <xsd:element maxOccurs="1" minOccurs="1" name="Location" type="xs:Address"></xsd:element>
  17:       <xsd:element minOccurs="0" maxOccurs="1" name="PostingDate" type="xsd:date"></xsd:element>
  18:       <xsd:element minOccurs="0" maxOccurs="1" name="CloseDate" type="xsd:date"></xsd:element>
  19:       <xsd:element minOccurs="0" maxOccurs="1" name="Benefits" type="xsd:string"></xsd:element>
  20:       <xsd:element maxOccurs="1" minOccurs="1" name="Salary"  type="xsd:string"></xsd:element>
  21:       <xsd:element maxOccurs="1" minOccurs="0" name="JobType" type="xs:JobType"></xsd:element>
  22:       <xsd:element minOccurs="0" maxOccurs="1" name="Function" type="xs:JobFunction"></xsd:element>
  23:       <xsd:element minOccurs="0" maxOccurs="1" name="Category" type="xs:JobCategory"></xsd:element>
  24:     </xsd:sequence>
  25:   </xsd:complexType>
  26:  
  27:   <xsd:simpleType name="JobType">
  28:     <xsd:restriction base="xsd:string">
  29:       <xsd:enumeration value="full-time"></xsd:enumeration>
  30:       <xsd:enumeration value="part-time"></xsd:enumeration>
  31:       <xsd:enumeration value="contractor"></xsd:enumeration>
  32:     </xsd:restriction>
  33:   </xsd:simpleType>
  34:  
  35:   <xsd:complexType name="Address">
  36:     <xsd:sequence>
  37:       <xsd:element minOccurs="0" maxOccurs="1" name="Street" type="xsd:string"></xsd:element>
  38:       <xsd:element minOccurs="0" maxOccurs="1" name="City" type="xsd:string">   </xsd:element>
  39:       <xsd:element minOccurs="0" maxOccurs="1" name="Country" type="xsd:string"></xsd:element>
  40:     </xsd:sequence>
  41:   </xsd:complexType>
  42:  
  43:   <xsd:simpleType name="JobCategory">
  44:     <xsd:restriction base="xsd:string">
  45:       <xsd:enumeration value="Automotive"/>
  46:       <xsd:enumeration value="Banking"/>
  47:       <xsd:enumeration value="Construction"/>
  48:       <xsd:enumeration value="Internet"/>
  49:       <xsd:enumeration value="Retail"/>
  50:       <xsd:enumeration value="Services"/>
  51:     </xsd:restriction>
  52:   </xsd:simpleType>
  53:  
  54:   <xsd:simpleType name="JobFunction">
  55:     <xsd:restriction base="xsd:string">
  56:       <xsd:enumeration value="Chief Peanut Butter Spreader"/>
  57:       <xsd:enumeration value="I ran the whole ship"/>
  58:       <xsd:enumeration value="Other"/>
  59:     </xsd:restriction>
  60:   </xsd:simpleType>
  61: </xsd:schema>

image

Once we have a schema defined like this we can generate code to be used for a service.  We have a tool at our disposal that is available within the Visual Studio Command Prompt called XSD.exe.  This executable does a lot of things but one thing it can do is generate code from an XML Schema Definition. 

When generating from the XSD file I was sent there was a problem with it.  Here is the walk through of that story so you can follow along. 

image

When I first tried this on the reader’s original XSD I got an error:

Warning: cannot generate classes because no top-level elements with complex type were found.

What does this mean?  Well, look at the screen shot of the XML Schema Explorer above.  Do you see the <> green icons?  Well those represent an XML Element.  An element is a fancy name for an XML tag like:  <Cows>Bramar</Cows> 

Let me roll this up and take another screen shot so you can start to see the problem (i have to hit my magic number of 12 screen shots anyway 🙂 ).

image

See the problem?  There isn’t an element in this schema (no green <> thingy).  What this means is we have a schema which just lists complex types of elements and enumerations.  There isn’t any “xml” in this schema.  The fix is simple though.  Add an element to the schema. 

   1: <xsd:element name="JobListing" type="xs:Job" />

Now we have a green thingy icon which means this XSD contains at least one element.  Basically think of the JobListing element as the root element.

image

Now that we have an element we can generate a C# class file from this XSD:

image

The code generated is about 350 lines so I’m not going to include it in the article.  There are some nice things happening for us when the C# classes are generated using xsd.exe. For starters the enumerations in the XSD are turned into C# enumerations.  The classes are marked serializable and they have the appropriate XML attributes on the properties to serialize these objects into XML.  This is a good thing since it means we didn’t have to create it.  Code generation is your friend.  Now that we have C# objects we can serialize these to XML easily. 

The Service

The first thing we need to do is create the WCF service.  For this example I chose to create a WCF Service Application in Visual Studio 2008.  After the project is initialized, the first thing we need to do is define the contract for the service.  In other words, what is coming in and going back out.  Since we have generated our code using the XSD utility we are going to use the XmlSerializer with our service.  The reason is this will make sure our XML formatted the way we intended.  While we are at it, I’ve made the service a RESTful type of service.  Here is the contract.

   1: [ServiceContract]
   2: public interface IJobService
   3: {
   4:  
   5:     [OperationContract]
   6:     [XmlSerializerFormat]
   7:     [System.ServiceModel.Web.WebGet(UriTemplate="/jobs/{type}", RequestFormat=WebMessageFormat.Xml)]
   8:     List<Job> GetJobListings(string type);
   9: }

The contract above has one method GetJobListings().  This method has two additional attributes.  One, the attribute to mark the method to serialize using the XmlSerializer and two the attribute to turn the method into a RESTful service.  In other words our service can be accessed like this:

http://localhost/service.svc/jobs/full-time

Now that the contract is setup, we just need a class to implement this contract on.  Here’s a quick and dirty implementation.

   1: public class Service1 : IJobService
   2: {
   3:  
   4:     #region IJobService Members
   5:  
   6:     public List<Job> GetJobListings(string type)
   7:     {
   8:         return GetJobs();
   9:     }
  10:  
  11:     private static List<Job> GetJobs()
  12:     {
  13:         var jobs = new List<Job>();
  14:         jobs.Add(new Job { JobType= JobType.parttime, Category = JobCategory.Banking, Benefits= "You are on your own.", Description="I did something" });
  15:         jobs.Add(new Job { JobType= JobType.fulltime, Category = JobCategory.Banking, Benefits= "You get something." });
  16:         jobs.Add(new Job { JobType= JobType.contractor, Category = JobCategory.Banking, Benefits= "Times are tuff, deal with it." });
  17:         jobs.Add(new Job { JobType= JobType.fulltime, Category = JobCategory.Banking, Benefits= "How does $700 billion sound?" });
  18:         return jobs;
  19:     }
  20:     #endregion
  21: }

Now all we have left is to get this working is to configure WCF to support our RESTful implementation.  In order to do this we are going to use the webHttpBinding.  Here is the WCF configuration to implement our RESTful service.

   1: <system.serviceModel>
   2:   <bindings>
   3:     <webHttpBinding>
   4:       <binding name="rest" />
   5:     </webHttpBinding>
   6:   </bindings>
   7:   <services>
   8:     <service behaviorConfiguration="WcfService1.Service1Behavior"
   9:      name="WcfService1.Service1">
  10:       <endpoint address="mex" binding="mexHttpBinding" name="wsdl"
  11:        contract="IMetadataExchange" />
  12:       <endpoint address="" behaviorConfiguration="NewBehavior" binding="webHttpBinding"
  13:        bindingConfiguration="" name="web" contract="WcfService1.IJobService" />
  14:     </service>
  15:   </services>
  16:   <behaviors>
  17:     <endpointBehaviors>
  18:       <behavior name="NewBehavior">
  19:         <webHttp />
  20:       </behavior>
  21:     </endpointBehaviors>
  22:     <serviceBehaviors>
  23:       <behavior name="WcfService1.Service1Behavior">
  24:         <serviceMetadata httpGetEnabled="true" />
  25:         <serviceDebug includeExceptionDetailInFaults="false" />
  26:       </behavior>
  27:     </serviceBehaviors>
  28:   </behaviors>
  29: </system.serviceModel>

That’s it, we are all setup.  Now all we have to do is launch the service and browse to the URL we outlined earlier to get our results.

image

This may seem like a lot of steps but it really isn’t.  I encourage you to take this example and play with it.  You can download the solution below.

Download Solution WcfService.zip

Fun with Live Mesh, Live Tools, Windows Mobile and Home Server

Posted by Keith Elder | Posted in Home Server, Live, Mobile Devices | Posted on 01-11-2008

image Just getting back from PDC 2008 I have to say the coolest non-developer thing your grandmother or mom can use that got an upgrade was Live Mesh.  I really like Live Mesh for a lot of reasons.  First and foremost it solves a real problem by syncing data, accessing devices and connecting devices together.  We are only starting to see the beginning that is the vision of the Live platform, trust me, there is a lot more to come.  Live Mesh in particular opens the door for a brand new world of cross platform peer to peer data syncing and more.  Secondly it provides a rich API through the Live Framework whereby developers can integrate their applications with it.  Let’s play around with Live Mesh, Live Tools and a few other things to see what kind of fun we can have.

What problems does Live Mesh solve?  Well for starters it solves the problem of syncing files.  Jeff Blankenburg wrote a post last week that gave five reasons you should give Live Mesh a try.  This week at PDC we can add two more reasons to Jeff’s list:

  1. Mobile Client
  2. Mac Client

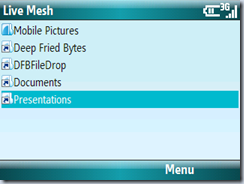
If you want to play with the Windows Mobile client for Live Mesh, to get started read the post on the team’s blog here.  Note that Windows Mobile 6 or 6.1 is required.  Once installed on your mobile phone you’ll get a “Mobile Pictures” folder in your mesh.  You can also sync other folders from your mesh with your mobile phone.  Here’s what the mobile client looks like on Windows Mobile.

sshot000

Once I installed the mobile client I picked up my Blackjack II and took a quick picture of my dogs taking a nap in the floor of my office.

Within a few seconds the photo I took on my phone showed up on my desktop.  From phone to computer and computer to phone is now incredibly easy.  Once the photo was on my machine I could open it up and edit it and drop it into Live Writer, yet another great tool from the Live team.  Are you starting to get the picture?

image

The story starts to really unfold when you start combining Live Mesh and other Live tools such as Windows Live Photo Gallery Beta and Windows Home Server

Here are the pieces of the puzzle:

  • Live Mesh – storage and peer to peer syncing from the cloud from various clients such as Windows, Mobile and Mac
  • Windows Live – a collection of various for free tools that are purposed for the cloud
  • Windows Home Server – the home appliance that let’s you access your data internally and externally as well as provides a powerful backup mechanism

Think of it like this.  If I take a picture on my windows mobile phone sure I want it to sync that photo with my desktop but I also want to make sure I have that photo backed up and also persisted to permanent backup to the cloud in case something happens (home server drives fail etc).  I also want this to happen without me having to *think* about it.  You might ask , “Doesn’t Live Mesh hold all of my data though?”.  The answer to that is no. 

Currently we get only 5GB of storage with Live Mesh.  Really this isn’t bad but I would never expect Microsoft to hold the world’s data.  However, there is this product called “Groove” that does great peer to peer replication among other things.  See the dog fooding going on now? 

If you exceed the 5GB of data Live Mesh gives you, it immediately switches to peer to peer.  This means you can sync way more data than 5GB.

I mentioned Live Photo Gallery and Home Server so let me start with Home Server.  Integrating Live Mesh with Home Server is where the story starts to get even more interesting.  At PDC2008 we got to see some of that story and where it is headed.  Nothing has been released yet for Home Server but Brendan Grant, who we interviewed in Deep Fried Bytes Episode 12 on Home Server, showed part of the Live Mesh story with Home Server at PDC 2008.

image

In other words there will be a direct Live Mesh plug in for Home Server.  Right now I am cheating and installed Live Mesh on Home Server directly to sync my Mobile Pictures to see how this will play out once the real plug in is released.  Since I run KeepVault on Home Server, an unlimited backup cloud storage add on for Home Server,  I now have this kind of story.  It goes something like this:

image

Your next question may be “How do I view the pictures?”.  Answer:  Windows Live Photo Gallery (which is currently part of the http://download.live.com tools).  To make the Photo Gallery and Home Server story work I have set my import folder directly to the Home Server share.

image

Since all of my photos are imported directly to Home Server (which then gets backed up to the cloud) it means any photos that home server syncs with my mobile phone are immediately visible via Windows Live Photo Gallery.  This means I can tag, edit, fix, or delete all from one central place.  Here is the picture above with Simon and Max shown in Windows Live Photo Gallery:

image

Are you starting to see the picture (no pun intended)? We are only seeing a small portion of things that Live* can do for us.  This is why I am “super excited” because this technology is something my Mom, my sister’s, and certainly my wife will use.  Today we use Live Mesh to sync GBs of audio we record for http://deepfriedbytes.com with Live Mesh.  Woody and I never have to worry about keeping track of where things are at, it just works.

If you haven’t started to play around with this stuff, give it a try.

DISCLAIMER

Read RTA’s Techie Blog post before you decide to install Live Mesh directly onto your Home Server.  Again, this is going to be supported, we just don’t know when yet.